Imagine sinking your teeth into a perfectly cooked cut of beef – tender, incredibly juicy, bursting with rich flavor, and sporting a beautiful, savory crust. Now, imagine achieving this masterpiece not on a smoker or an outdoor grill, but right in your own kitchen oven, any time of year. This isn't a culinary pipe dream; it's the delicious reality of Easy Oven Roasted Tri-Tip: Perfect Steak Without a Grill using the revered reverse sear method. This technique elevates a fantastic, yet often overlooked, cut of beef into an unforgettable dining experience.
The tri-tip roast, with its distinctive triangular shape, is a true gem among beef cuts. While traditionally associated with outdoor grilling, especially in its home state of California, the reverse sear method makes it accessible to everyone, everywhere, regardless of the weather. By carefully roasting it in the oven to near perfection and then finishing it with a quick, high-heat sear, you unlock unparalleled tenderness and a mouthwatering crust that will have everyone asking for seconds. Get ready to master the art of the roasted tri tip and transform your mealtime.
Unlocking the Secret to Tender, Juicy Tri-Tip: The Reverse Sear Method
Before diving into the cooking magic, let's get acquainted with our star ingredient: the tri-tip. This unique cut of beef comes from the bottom sirloin subprimal, earning its name from its unmistakable triangular shape and the way it tapers to a "tip." Historically, it was often ground into hamburger meat, but its rich, beefy flavor and excellent texture when cooked correctly have propelled it into the spotlight as a sought-after roast and steak. You’ll typically find it at a more approachable price point than many premium steaks, making it an excellent choice for a memorable yet Budget-Friendly & Tender: Mastering Oven Roasted Tri-Tip.
The secret to its success, especially with this recipe, lies in the cooking method: the reverse sear. Unlike traditional methods that blast meat with high heat first and then lower the temperature, the reverse sear flips the script. It involves:
- Gentle Oven Roasting: The tri-tip slowly bakes in a moderately heated oven, allowing the internal temperature to rise gradually and evenly. This gentle heat ensures a consistently cooked interior from edge to edge, minimizing the dreaded "gray band" often seen in conventionally seared meats. It also helps to tenderize the meat beautifully.
- High-Heat Finishing Sear: Once the meat is nearly cooked through, it's transferred to a scorching hot cast iron pan (or another heavy-bottomed skillet) for a quick, intense sear. This creates that irresistible, deeply browned, flavorful crust – the hallmark of a perfectly cooked steak.
This method offers superior control over doneness, making it incredibly forgiving, even for novice cooks. For the best results, always aim for Choice or Prime grade tri-tip, as these offer a better marbling of fat, contributing to a more tender and flavorful finished product compared to Select grade.
Why Oven Roasting Tri-Tip is Your New Go-To Recipe
Beyond its delicious outcome, the oven-roasted tri-tip with a reverse sear boasts several practical advantages that make it a favorite in countless kitchens.
Budget-Friendly Brilliance
In an era where steak prices are steadily climbing, tri-tip remains a fantastic value. You can often find a two-pack at warehouses like Costco for significantly less per pound than most prime cuts. This makes it an ideal choice for feeding a family or entertaining guests without breaking the bank. If you can't find it at your local grocery store, a good butcher will undoubtedly carry it, or you might find it labeled as bottom sirloin or California cut. It's a testament that you don't need the most expensive cut to achieve exquisite flavor and tenderness.
Year-Round Enjoyment, Effortless Process
One of the biggest perks of this oven method is its complete independence from outdoor weather conditions. No need to brave the winter chill or summer heat to get that perfect char. This means a perfectly cooked tri-tip is a possibility any night of the week, year-round. The process itself is surprisingly hands-off once the roast is in the oven, freeing you up to prepare side dishes or simply relax. It���s incredibly easy to make, only requiring a handful of common ingredients and minimal active cooking time.
Flavor That Pops
The tri-tip's inherent beefy flavor is a wonderful canvas for robust seasonings. A simple yet effective dry rub forms the foundation of this recipe's flavor profile. While you can customize it, a classic blend often includes:
- Kosher salt and fresh cracked black pepper – the essential base.
- Ancho chili powder – for a mild, earthy, slightly smoky heat.
- Smoked paprika – enhancing the smoky depth, especially without a grill.
- Garlic powder – for that pungent, aromatic kick.
Applied liberally and allowed to rest on the meat, this rub penetrates the surface, creating an incredible flavor layer that complements the natural richness of the beef. This careful seasoning, combined with the cooking method, ensures every bite of your roasted tri tip is a flavor explosion.
Mastering the Reverse Sear Tri-Tip: Step-by-Step Guide
Achieving culinary perfection with your roasted tri tip is simpler than you might think. Follow these steps for consistently superb results.
1. The Essential Spice Rub
Begin by whisking together your chosen spice rub in a small bowl. For a 2 to 2.5 lb tri-tip, aim for about 2 tsp kosher salt, 1.5 tsp fresh cracked black pepper, 1 tsp ancho chili powder, 1 tsp smoked paprika, and 1 tsp garlic powder. Once combined, generously rub this mixture over every surface of your tri-tip. Don't be shy – a good coating ensures maximum flavor.
2. The Crucial Rest
This step is non-negotiable for tender, evenly cooked meat. After applying the rub, let the tri-tip rest at room temperature for at least 1 hour. This allows the salt to begin penetrating the meat and ensures the roast cooks more evenly from edge to center. If you're planning ahead, you can cover and refrigerate it for up to 24 hours, but remember to bring it back to room temperature for at least an hour before baking.
3. Low and Slow Oven Roasting
During the last 15 minutes of the resting period, preheat your oven to 350°F (175°C). Place the seasoned tri-tip on an oven-safe wire rack set over a rimmed baking sheet. This setup allows for even air circulation around the roast, promoting consistent cooking. Insert an oven-safe food probe thermometer into the thickest part of the roast, ensuring it doesn't touch bone or fat pockets. Set your thermometer to alert you when it reaches approximately 120-125°F (49-52°C) for medium-rare, or about 5 degrees shy of your ultimate desired doneness (e.g., 130°F for medium). Bake for about 40 to 55 minutes, keeping in mind that actual bake time will vary based on your roast's thickness and oven calibration.
4. The Sizzling Finish (Reverse Sear)
Once your tri-tip reaches its target internal temperature, carefully remove it from the oven. While the roast rests for a few minutes, place a heavy-bottomed cast iron skillet (or similar oven-safe pan) on your stovetop over high heat. Add about 1 tablespoon of high smoke point vegetable oil (like grapeseed or canola oil) to the scorching hot pan. Once the oil is shimmering and just beginning to smoke, carefully place the tri-tip into the pan. Sear for 2-3 minutes per side, or until a deep, golden-brown crust forms. Use tongs to sear the edges as well, if possible.
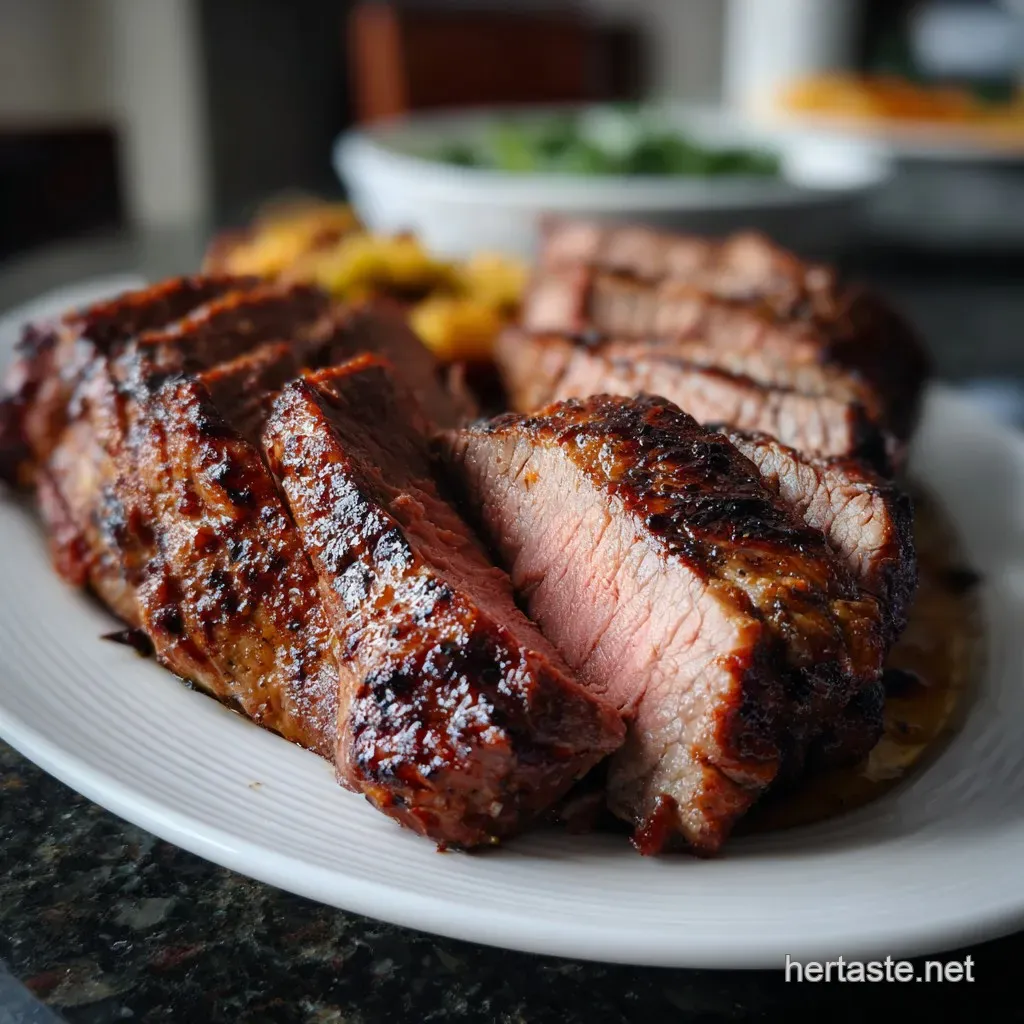
5. Final Rest and Slicing
After searing, transfer the tri-tip to a cutting board and let it rest for another 10-15 minutes. This allows the juices to redistribute throughout the meat, ensuring every slice is incredibly moist. Resisting the urge to cut too soon is crucial! Finally, slice the tri-tip against the grain for maximum tenderness. Tri-tip has two distinct grain patterns, which can run in different directions. Look closely and slice accordingly, often needing to rotate the roast halfway through slicing to accommodate the change in grain.
Pro Tips for Your Perfect Roasted Tri Tip
- Invest in a Good Thermometer: An oven-safe probe thermometer is your best friend for precision cooking, ensuring you hit that perfect internal temperature every time.
- Don't Skip the Rest: Both pre-oven and post-sear resting periods are vital for texture and juiciness. Patience is a virtue here.
- Consider the Fat Cap: Tri-tip often comes with a fat cap. You can trim it down to about ¼ inch or leave it entirely, as it contributes to flavor and moisture during cooking. If it's very thick, trimming some off can prevent uneven cooking or excessive grease.
- Mind Your Doneness: Tri-tip is best enjoyed medium-rare to medium (130-135°F / 54-57°C after resting). Cooking it past medium can lead to dryness.
- Pairing Perfection: This versatile roast pairs beautifully with a myriad of sides. Think roasted vegetables like asparagus or Brussels sprouts, creamy mashed potatoes, a fresh garden salad, or even a flavorful chimichurri sauce.
Mastering the art of the reverse sear roasted tri tip in your oven will undoubtedly elevate your home cooking to new heights. It’s a testament to how simple techniques can yield extraordinary results, turning a humble cut of beef into a show-stopping meal.
There you have it – a comprehensive guide to preparing a tender, juicy, and flavorful tri-tip roast, all from the comfort of your kitchen. Say goodbye to the limitations of weather and hello to year-round enjoyment of this incredible cut of beef. With its budget-friendly nature and impressive results, the reverse sear tri-tip is sure to become a cherished addition to your culinary repertoire. So grab your tri-tip, season it with love, and get ready to enjoy a truly memorable dinner!
