Unlock Culinary Excellence: Your Guide to Budget-Friendly & Tender Oven Roasted Tri-Tip
Are you craving a show-stopping beef roast that’s both incredibly tender and surprisingly affordable? Look no further than the mighty tri-tip! While often associated with the grill, mastering oven roasted tri-tip brings this delightful cut into your kitchen year-round, regardless of the weather outside. Forget expensive steaks; this guide will walk you through creating a perfectly juicy and flavorful roasted tri-tip using a simple, yet highly effective, reverse searing method right in your oven.
What Exactly is Tri-Tip and Why Is It So Special?
Often hailed as "California's secret," the tri-tip roast is a triangular cut of beef that hails from the bottom sirloin subprimal. Its distinctive shape gives it its name, tapering to a "tip" at one end. For years, it was a regional specialty, primarily enjoyed on the West Coast, but its reputation for tenderness and rich, beefy flavor has spread, making it a favorite across the nation.
What makes tri-tip truly stand out? Beyond its delicious taste, it offers:
- Affordability: Compared to prime rib or even many popular steaks, tri-tip is often significantly more budget-friendly, making it an excellent choice for family dinners or entertaining without breaking the bank. Many savvy shoppers find great deals on two-packs at warehouse clubs, perfect for freezing one for later use.
- Versatility: While fantastic when roasted, tri-tip also shines on the grill or smoker. However, the oven method ensures a consistent, juicy result every time, making it accessible to all home cooks.
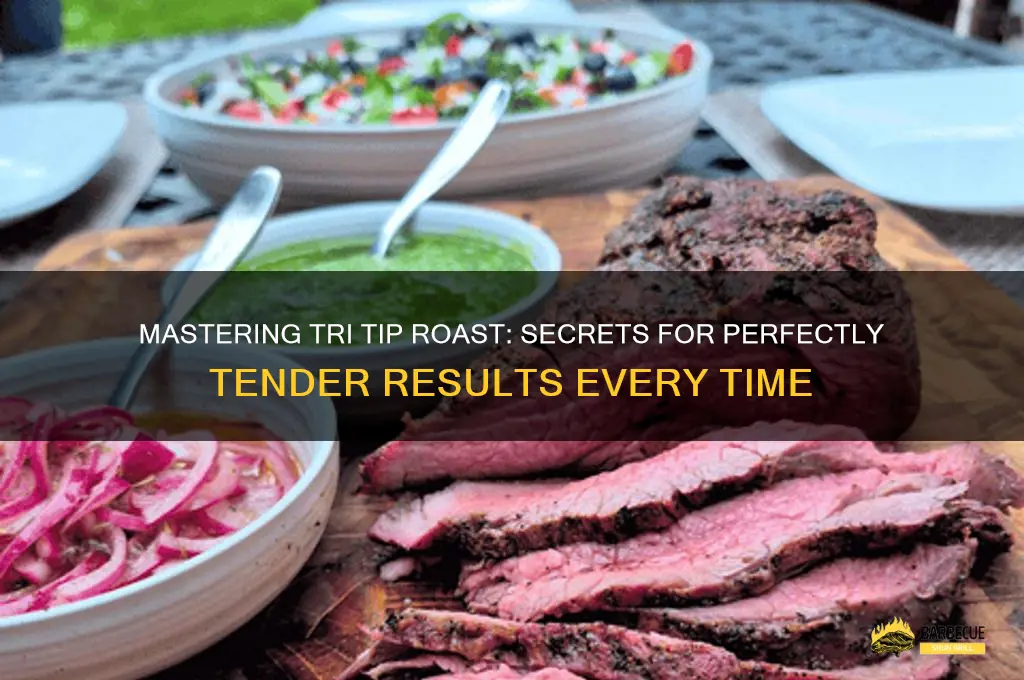
- Perfect Texture: When cooked to a medium doneness, tri-tip boasts a melt-in-your-mouth tender texture that rivals more expensive cuts. The key is in the cooking method and proper carving!
When selecting your tri-tip, look for Choice or Prime grades. While Select is available, Choice offers a good balance of quality and cost, with Prime providing superior marbling and tenderness for a slightly higher price. Avoid Select for the best experience.
The Secret to Tender Tri-Tip: Reverse Searing in the Oven
The magic behind truly tender and evenly cooked reverse sear tri-tip lies in the reverse searing technique. Unlike traditional methods where you sear first then roast, reverse searing involves:
- Slow Roasting: The tri-tip is cooked at a lower temperature in the oven until it's almost at your desired internal temperature. This slow, gentle heat allows the meat to cook more evenly from edge to edge, preventing the dreaded "gray band" of overcooked meat often seen with high-heat methods.
- High-Heat Searing: Once the roast is nearly done, it's transferred to a scorching hot cast iron pan (or another heavy-bottomed, oven-safe skillet) for just a few minutes. This quick burst of intense heat creates a beautiful, flavorful crust – known as the Maillard reaction – locking in juices and adding incredible texture.
This method offers several advantages:
- Unmatched Tenderness: The gentle roasting process breaks down connective tissues, resulting in a more tender product.
- Even Doneness: Say goodbye to overcooked edges and undercooked centers. The reverse sear delivers consistent doneness throughout the roast.
- Superior Crust: The final high-heat sear gives you that restaurant-quality browned crust without overcooking the interior.
- Year-Round Enjoyment: No grill? No problem! This oven-based approach means you can enjoy perfectly roasted tri-tip any time, regardless of weather.
Crafting Your Perfect Spice Rub & Preparation Steps
A great tri-tip starts with a fantastic flavor base. While simple salt and pepper are effective, a homemade spice rub elevates the beefy flavor to new heights. Here's a robust yet balanced rub that complements the meat without overpowering it:
Ingredients for a Flavorful Tri-Tip Roast:
- 2 to 2 1/2 lb tri-tip roast (Choice or Prime grade recommended)
- 2 tsp kosher salt (enhances flavor, crucial for tenderizing)
- 1 1/2 tsp fresh cracked black pepper (adds a pungent warmth)
- 1 tsp ancho chili powder (provides a smoky, mild pepper note without heat)
- 1 tsp smoked paprika (deepens the smoky flavor, adds color)
- 1 tsp garlic powder (a savory aromatic staple)
- 1 Tbsp vegetable oil (for the final sear)
Preparation is Key:
- Prepare the Spice Rub: In a small bowl, whisk together the kosher salt, fresh cracked black pepper, ancho chili powder, smoked paprika, and garlic powder.
- Season the Tri-Tip: Pat the tri-tip dry with paper towels – this helps the rub adhere and promotes a better crust. Generously apply the spice rub over the entire surface of the roast, ensuring every side is coated. Don't be shy; the robust flavor of tri-tip can handle it.
- Rest at Room Temperature: This is a crucial step! Allow the seasoned tri-tip to rest at room temperature for at least 1 hour. If you have time, you can even cover and refrigerate it for up to 24 hours, then bring it out to rest for 1 hour at room temperature before cooking. Bringing the meat to room temperature ensures more even cooking and reduces the overall cook time. During the last 15-20 minutes of this rest, preheat your oven to 350°F (175°C).
Roasting & Searing: Step-by-Step Instructions for Your Roasted Tri-Tip
Now that your tri-tip is seasoned and rested, it's time to bring it to perfection. An oven-safe wire rack placed over a rimmed baking sheet is ideal for allowing air circulation around the roast, promoting even cooking.
The Roasting Phase:
- Prepare for Roasting: Place the tri-tip on an oven-safe wire rack set over a rimmed baking sheet.
- Insert a Probe Thermometer: For precise results, insert an oven-safe food probe thermometer into the thickest part of the roast, avoiding bone or large pockets of fat. Set your thermometer to alert you when the internal temperature reaches 120-125°F (49-52°C) for medium-rare, or about 5 degrees shy of your target doneness (e.g., 130-135°F for medium).
- Bake Until Nearly Done: Transfer the baking sheet with the tri-tip to your preheated 350°F (175°C) oven. Roast for approximately 40 to 55 minutes. Cooking time will vary significantly based on the thickness of your roast and your desired final doneness. Monitor your probe thermometer closely.
The Searing Phase:
- Preheat Your Skillet: About 10-15 minutes before the tri-tip reaches its initial target temperature in the oven, place a cast iron skillet (or another heavy-bottomed, oven-safe pan) on your stovetop over high heat. Add 1 tablespoon of vegetable oil and let it get scorching hot – you should see wisps of smoke.
- Sear for a Golden Crust: Carefully transfer the tri-tip from the oven to the hot skillet. Sear for 2-3 minutes per side, rotating to ensure all surfaces get a beautiful, deep brown crust. Keep an eye on the internal temperature; you're aiming for a final temperature of 130-135°F (54-57°C) for medium-rare or 135-140°F (57-60°C) for medium.
Tips for Success & Serving Suggestions
Achieving a truly tender and flavorful roasted tri-tip goes beyond just cooking. These final steps and considerations will make all the difference:
- Resting is Non-Negotiable: Once your tri-tip reaches your desired internal temperature and has been seared, immediately remove it from the skillet and place it on a cutting board. Tent loosely with foil and let it rest for 10-15 minutes. This crucial step allows the juices to redistribute throughout the meat, resulting in a more tender and juicy slice. Skipping this step will result in juices running out, leaving you with dry meat.
- Carve Against the Grain: Tri-tip is unique because its grain runs in two different directions. You'll notice a point where the muscle fibers change direction. For maximum tenderness, it's vital to slice against the grain. Cut the roast in half at this point where the grain changes, then slice each half against its respective grain into 1/2-inch thick slices.
- Pairing Perfection: Roasted tri-tip is incredibly versatile. It pairs beautifully with roasted vegetables like potatoes, carrots, or asparagus, a fresh green salad, or a classic side of mashed potatoes. Consider a chimichurri sauce or a red wine reduction to elevate the flavors.
- Leftovers (if any!): Leftover tri-tip makes fantastic sandwiches, salads, or even beef tacos. For best quality, consume within 3-4 days. For longer storage, freeze sliced portions in an airtight container for up to 3 months.
Mastering oven roasted tri-tip is a game-changer for any home cook. It’s a testament to how simple techniques can yield extraordinary results, proving that you don't need a fancy grill or an expensive cut to create a memorable, tender, and delicious beef roast. Enjoy the process, and savor every budget-friendly, tender bite!
